Send to Microsoft 365 SharePoint
The Send to Microsoft 365 SharePoint connector delivers scanned documents to Microsoft 365 SharePoint Server. It uses the Microsoft Graph REST API to access SharePoint or OneDrive.
This connector can only be added to a workflow whose [Job Processing Location] is set to [On Server].
This function is available only for the devices with the SLNX Embedded Applications Type Smart installed.
Authentication
The Send to Microsoft 365 SharePoint connector supports two authentication methods:
- From Cloud Authentication
- From OpenID Connect Login
Authentication from Cloud Authentication
Refer to Cloud Authentication Authorization.
Authentication from OpenID Connect Login
- Configure the OpenID Connect authentication profile under [System] ® [Security]® [Authentication Profiles] ® [OpenID Connect] tab. Refer to Open ID Connect Authentication.
- Add the connector-specific scopes to [Scope] in "Microsoft 365". For Microsoft 365 or Microsoft 365 - Proxy, you must configure the Microsoft Entra ID service to allow the Microsoft 365 SharePoint connector to access the Microsoft 365 repository. Refer to Microsoft 365 Cloud Authentication Settings.
- Users must use the configured OpenID Connect authentication profile to log in on the Smart Operation Panel.
Supported Environment
-
Supported Microsoft 365 Identity Provider: Azure Active Directory (AAD)
-
If using national cloud, the following conditions must be satisfied:
- Endpoint of Azure AD, Service Root Endpoint, and Microsoft 365 service must be the same national edition.
- Endpoint of Azure AD and Root Endpoint must be accessible from the Core Server and the Delegation Server.
- The same Graph API as the global edition must be provided in the national edition. It depends on Microsoft whether the same Graph API level is available in a specific national cloud.
To configure the properties of the Send to Microsoft 365 SharePoint connector:
The following configuration must be completed. The procedure is the same for a login user workflow and a proxy user workflow, except for Step 4.
-
Configure the settings in [Microsoft 365 - Proxy] of [Cloud Authentication Settings]. For details about [Cloud Authentication Settings], refer to Cloud Authentication Authorization.
-
In the Delivery Flow, click the [Send to Microsoft 365 SharePoint] connector icon.
-
On the [Send to Microsoft 365 SharePoint] tab, enter the display name in [Display Name].
-
Under [Server Settings], select [SharePoint].
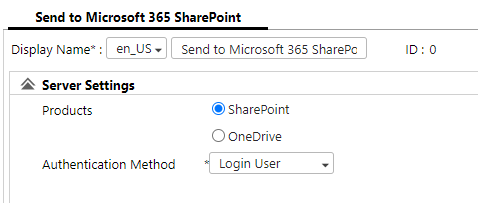
-
Choose an Authentication Method and configure the accompanying authentication settings. If you choose Proxy User, you must identify the following:
-
Login User: User credentials are specified at the MFP.
-
Proxy User: The Login information entered below is used to authenticate.
-
Cloud Application: Select the specific cloud application. This field is populated based on the application names identified in Microsoft 365 Cloud Authentication Settings.
-
Email Address: Required if Proxy User is selected. Populated automatically after successful authorization is complete.
-
Authorization URL: Required only if Proxy User is selected. This field is automatically populated when Cloud Authentication Settings are registered for Microsoft 365 – Proxy.
-
Authorization Code: Required only if Proxy User is selected. Click Authorize to obtain a refresh token from Exchange servers by using a specified authorization code.
-
-
IP Address: Enter the IP Address of the proxy server.
-
Port No: Enter the port number to connect to the proxy server. The default value is 8080.
-
Account: Enter the account to login to the proxy server.
-
Password: Enter the password to use to login to the proxy server.
- From OpenID Connect Login: The same OAuth Token will be used that was issued during the OpenID Connect log-in performed by the user on the device panel.
- From Cloud Authentication: The OAuth Token will be obtained using the configured settings in Cloud Authentication Settings.
|
Setting |
Options |
|---|---|
|
Authentication Method |
|
|
HTTP Proxy Server |
If you are connecting through a proxy server, complete the following fields. |
| MS Graph Endpoint |
Specify the service root endpoint. The input value must start with “http” or “https”. The default value is https://graph.microsoft.com (the default URL for the Global Entra ID service). If using a different national Entra ID service, change the value. Ensure you confirm the value on the official Microsoft page: https://learn.microsoft.com/en-us/graph/deployments. |
| OAuth Token Option |
This setting is necessary when the Authentication Method is set to Login User. Specify the method of authentication that is used to obtain the OAuth token for this workflow. |
| OpenID Connect Scope |
This setting is enabled only when the OAuth Token field is set to "OpenID Connect Login". Scopes must be set in the scope field of the OIDC authentication profile. The OpenID Connect Scope field is needed when a mixed scope is needed to obtain an access token during OpenID Connect authentication; otherwise, it can be left empty. The value entered in this field must match the Scope Extension value defined in the OpenID Connect authentication profile. By default, the following scope values are listed: https://graph.microsoft.com/Mail.ReadWrite https://graph.microsoft.com/Mail.Send https://graph.microsoft.com/User.ReadBasic.All https://graph.microsoft.com/GroupMember.Read.All offline_access |
Add/Delete StartPoint Path
-
Under [Add/Delete StartPoint Path], click [Add].
-
On the [General Settings] tab of the [Add StartPoint Path] window, specify [Display Name], [Subsite Path], [Pre-selected Destination], and [Library and Folder Path].
-
Optionally, configure [Enable SharePoint Site Selection] if the product chosen is Sharepoint on the Server Settings tab.
-
Optionally, enable the [Pre-selected Destination] checkbox to set a default Startpoint. This preset allows the user to bypass the need to start from the root site, and can use (or start from) the Pre-seleted destination.
-
Configure the settings to use a subfolder as the delivery destination as necessary.
-
When the product is SharePoint, you can configure the property column in the library specified as the delivery destination. To start configuration, click [Add] on the [Field Settings] tab.
To delete the added document information association, select the association you want to delete from the list, and click [Delete].
-
On the [Add Field Settings] window, configure [Content Type], [MOSS Field], and [Setting Value], and then click [OK].
By adding and associating the names of metadata elements configured when the document is scanned as a property column on Microsoft 365 SharePoint, the metadata can be standardized and document management can be improved.
-
Click [OK].
-
Save your changes to the workflow.
For full descriptions of the Send to Microsoft 365 SharePoint settings needed, refer to Microsoft 365 SharePoint Settings.